> ## Documentation Index
> Fetch the complete documentation index at: https://docs.quraite.ai/llms.txt
> Use this file to discover all available pages before exploring further.
# Quickstart
> Connect a real conversational agent to Quraite and run your first evaluation in under 15 minutes.
By the end of this guide, you will:
* Connect **your agent** to Quraite.
* Run your **first evaluation**.
* Inspect **turn-level failures** in the results.
**Time:** \~10-15 minutes\
**Outcome:** Your first confidence signal.
## 1. Create Your Agent
Inside a new folder, run the following commands:
uv:
```bash theme={null}
uv init
```
poetry:
```bash theme={null}
poetry init -n # Non-interactive mode
```
Update **requires-python** in `pyproject.toml` to **>=3.10,\<=3.14.0** if it was auto-generated by Poetry.
This is done to avoid any compatibility issues with the dependencies.
default venv:
```bash theme={null}
python -m venv .venv
```
Install Quraite SDK and agent dependencies.
uv (recommended):
```bash theme={null}
uv add quraite python-dotenv langchain langchain-google-genai
```
poetry:
```bash theme={null}
POETRY_VIRTUALENVS_IN_PROJECT=true poetry add quraite python-dotenv langchain langchain-google-genai
```
pip:
```bash theme={null}
source .venv/bin/activate # On Windows: .venv\Scripts\activate
pip install quraite python-dotenv langchain langchain-google-genai
```
This example uses Gemini. Set the `GOOGLE_API_KEY` environment variable using a `.env` file.
Create one if you don't have one from the [Google AI Studio API Keys](https://aistudio.google.com/api-keys).
This example uses a simple calculator agent using Langchain.
Create a new file called `agent.py` and paste the code below into the file.
```python theme={null}
from dotenv import load_dotenv
from langchain.agents import create_agent
from langgraph.checkpoint.memory import InMemorySaver
load_dotenv(override=True)
def add(a: float, b: float) -> float:
"""Add two numbers"""
return a + b
def subtract(a: float, b: float) -> float:
"""Subtract two numbers"""
return a - b
def multiply(a: float, b: float) -> float:
"""Multiply two numbers"""
return a * b
def divide(a: float, b: float) -> float:
"""Divide two numbers"""
return a / b
langchain_agent = create_agent(
model="google_genai:gemini-2.5-flash",
tools=[add, subtract, multiply, divide],
system_prompt="You are a helpful calculator assistant.",
checkpointer=InMemorySaver(),
)
```
## 2. Run Your Agent
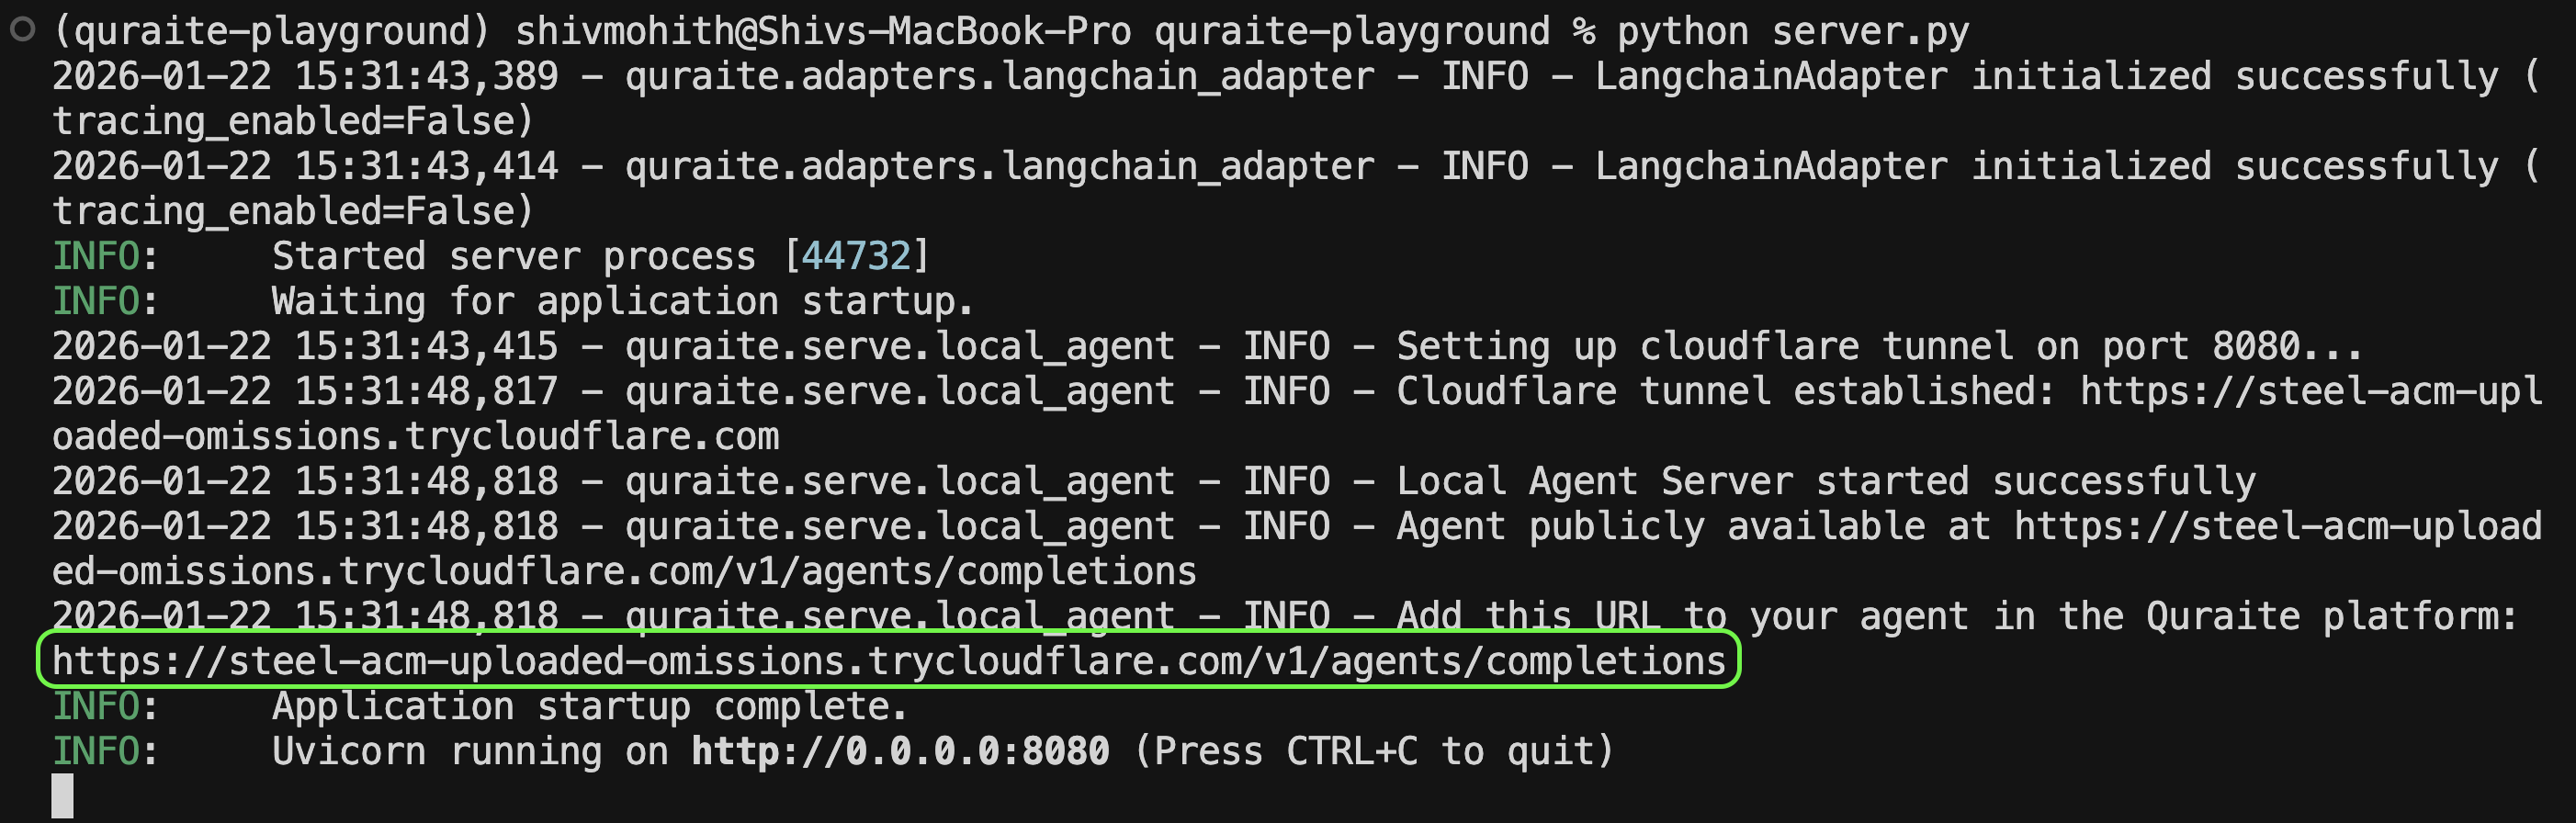
Run and expose your local agent to the internet using a tunnel so the Quraite platform can invoke it.
This example uses Cloudflare Tunnel. Other options like ngrok are also supported.
Cloudflare binaries are automatically downloaded and installed when you run the server. No need to install them manually.
At the bottom of `agent.py`, add:
```python theme={null}
# To run the agent locally
if __name__ == "__main__":
from quraite import run_agent
from quraite.adapters.langchain_adapter import LangchainAdapter
# A single line to run the agent locally and expose it to the internet using Cloudflare Tunnel
run_agent(LangchainAdapter(agent_graph=langchain_agent), port=8080, host="0.0.0.0", tunnel="cloudflare")
```
```bash theme={null}
source .venv/bin/activate # On Windows: .venv\Scripts\activate
```
```bash theme={null}
python agent.py
```
 ## 3. Create a New Project
Go to the [Quraite platform](https://app.quraite.ai) and sign in/sign up.
Quraite creates a **Default Project** on signup. For this guide, create a new project.
Click **+ New Project**
* **Project Name** (e.g. `Calculator`)
* **Description** (Optional)
Click **Create Project**.
## 4. Register the Agent
Click **+ New Agent** and enter the following details:
* **Agent Name** - `Calculator Agent (Local)`
* **Description** (Optional)
* **Agent URL** - Paste the Cloudflare tunnel URL copied from the terminal (e.g. `https://steel-acm-uploaded-omissions.trycloudflare.com/v1/agents/completions`)
Click **Create Agent**.
## 5. Configure Model Providers (BYOK)
Navigate to **Settings** on the left sidebar and click **+ New Provider Credential**.
Enter the following details:
* **Name** - `Google`
* **Provider** - Select `Google`
* **API Key** - Paste your Google API key (Create one if you don't have one from the [Google AI Studio API Keys](https://aistudio.google.com/api-keys))
* **Model** - Select `gemini-2.5-flash`
Click **Create Credential**.
Select provider (`Google`) and model (`gemini-2.5-flash`) to be used for **User Simulation**.
Select provider (`Google`) and model (`gemini-2.5-flash`) to be used for **Agent Judge**.
Click **Save**.
## 6. Create and Run a Test Case
This example uses a scenario-based test case.
Navigate to **Datasets** and click **+ New Dataset**.
Enter the following details:
* **Dataset Type** - Select `Scenario`
* **Dataset Name** - `Calculator Scenario Dataset`
* **Description** (Optional)
Click **Create Dataset**.
Click **+ First Test Case**.
Enter the following details:
* **Test Case Name** - `Calculate bill`
* **Scenario** - Enter the following scenario:
* *User ate at a restaurant for a bill of \$1250 and wants to calculate the amount after 20% discount in the first turn and then, wants to add 5% tax on it.*
* **Expected Behaviour** - Enter the following expected behaviour as 2 distinct steps:
* 1. *Agent responds with \$1000 after discount*
* 2. *Agent responds with \$1050 after tax*
* Choose the *Agent* that was previously created.
* Click **Run**.
* Observe user simulation, agent invocation, and behavior evaluation.
## 7. Next Steps
1. Save the test case for future runs.
2. Curate more edge-case **scenarios**.
## 3. Create a New Project
Go to the [Quraite platform](https://app.quraite.ai) and sign in/sign up.
Quraite creates a **Default Project** on signup. For this guide, create a new project.
Click **+ New Project**
* **Project Name** (e.g. `Calculator`)
* **Description** (Optional)
Click **Create Project**.
## 4. Register the Agent
Click **+ New Agent** and enter the following details:
* **Agent Name** - `Calculator Agent (Local)`
* **Description** (Optional)
* **Agent URL** - Paste the Cloudflare tunnel URL copied from the terminal (e.g. `https://steel-acm-uploaded-omissions.trycloudflare.com/v1/agents/completions`)
Click **Create Agent**.
## 5. Configure Model Providers (BYOK)
Navigate to **Settings** on the left sidebar and click **+ New Provider Credential**.
Enter the following details:
* **Name** - `Google`
* **Provider** - Select `Google`
* **API Key** - Paste your Google API key (Create one if you don't have one from the [Google AI Studio API Keys](https://aistudio.google.com/api-keys))
* **Model** - Select `gemini-2.5-flash`
Click **Create Credential**.
Select provider (`Google`) and model (`gemini-2.5-flash`) to be used for **User Simulation**.
Select provider (`Google`) and model (`gemini-2.5-flash`) to be used for **Agent Judge**.
Click **Save**.
## 6. Create and Run a Test Case
This example uses a scenario-based test case.
Navigate to **Datasets** and click **+ New Dataset**.
Enter the following details:
* **Dataset Type** - Select `Scenario`
* **Dataset Name** - `Calculator Scenario Dataset`
* **Description** (Optional)
Click **Create Dataset**.
Click **+ First Test Case**.
Enter the following details:
* **Test Case Name** - `Calculate bill`
* **Scenario** - Enter the following scenario:
* *User ate at a restaurant for a bill of \$1250 and wants to calculate the amount after 20% discount in the first turn and then, wants to add 5% tax on it.*
* **Expected Behaviour** - Enter the following expected behaviour as 2 distinct steps:
* 1. *Agent responds with \$1000 after discount*
* 2. *Agent responds with \$1050 after tax*
* Choose the *Agent* that was previously created.
* Click **Run**.
* Observe user simulation, agent invocation, and behavior evaluation.
## 7. Next Steps
1. Save the test case for future runs.
2. Curate more edge-case **scenarios**.